Staff&Users
Effortless Event Management for Any Event Type
Managing Users in GateMe
The “Users” section in the GateMe admin panel allows venue administrators to invite, manage, and remove staff members according to their role and responsibilities. You can access this section from the left-hand sidebar menu by clicking “Users”.
➕ Adding a New User
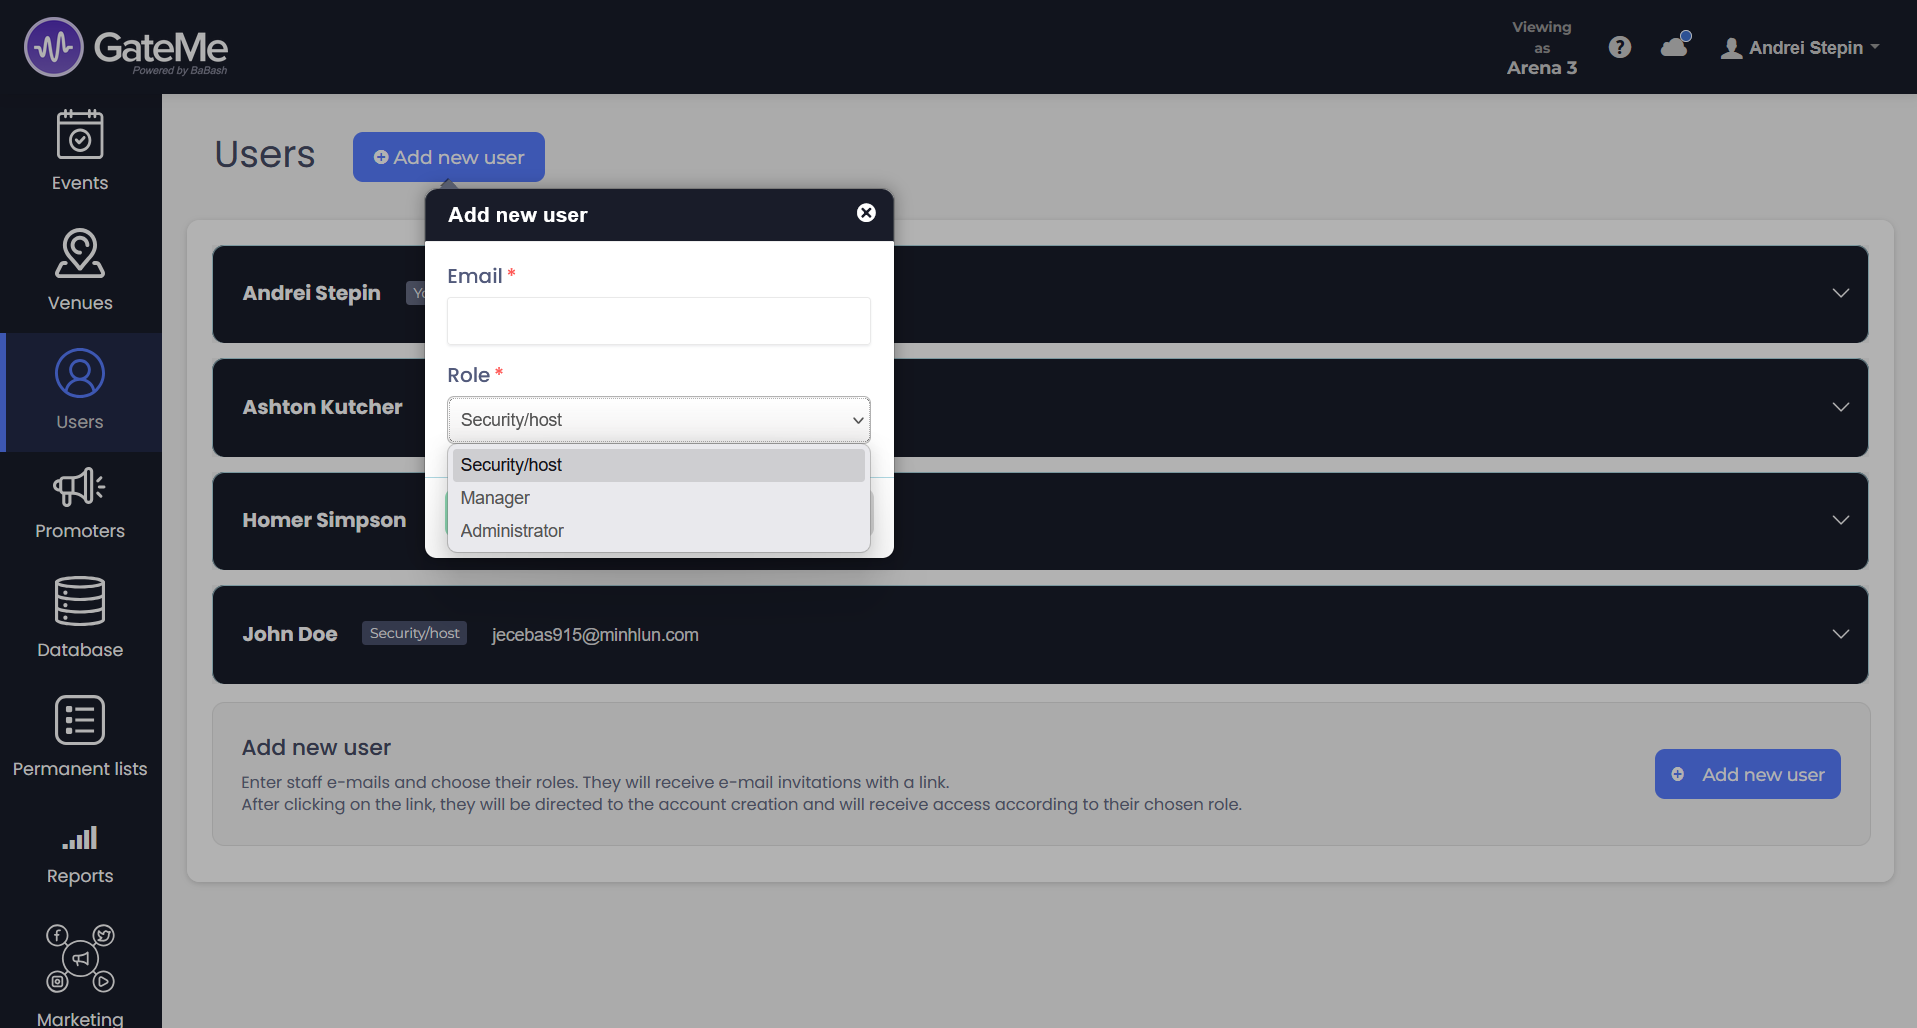
1. Click the Add new user button at the top of the Users section.
2. A modal will appear prompting you to:
-
Enter the user’s email address
-
Select a role from the dropdown menu:
-
Security/host – can view the guest list and check in guests.
-
Manager – can also create or edit events, lists, and floorplans, and access reports.
-
Administrator – full access, including editing venue details, managing users, and viewing billing information.
-
3. Click Add new user in the modal to send the invitation.
-
The user will receive an email with a link to set up their account.
-
After signing up, they’ll get access according to their assigned role.
📝 Editing User Roles
-
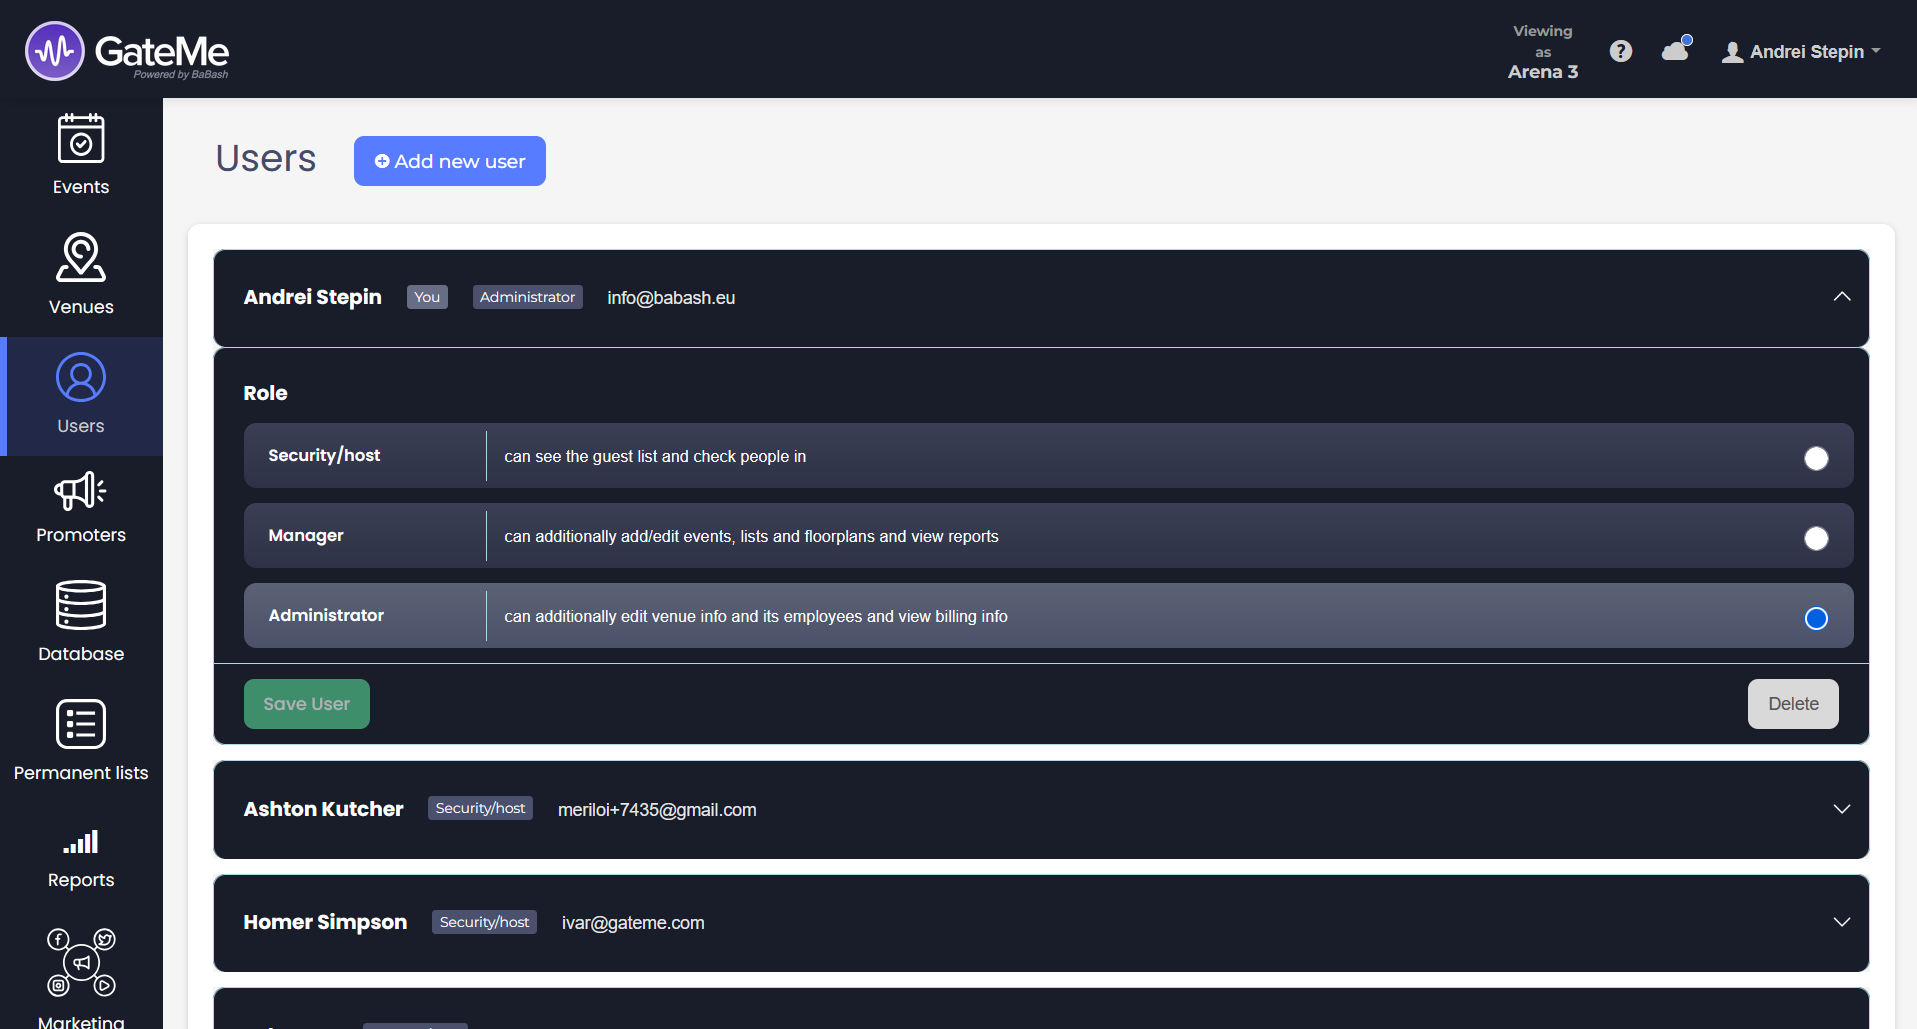
Find the user you want to update in the list.
-
Click the dropdown arrow on the right side of their name to expand their details.
-
Choose a different role by selecting the appropriate option under Role.
-
Click Save User to confirm the change.
⚠️ Note: Changing a role will instantly affect what the user can access inside the platform.
🗑️ Removing a User
-
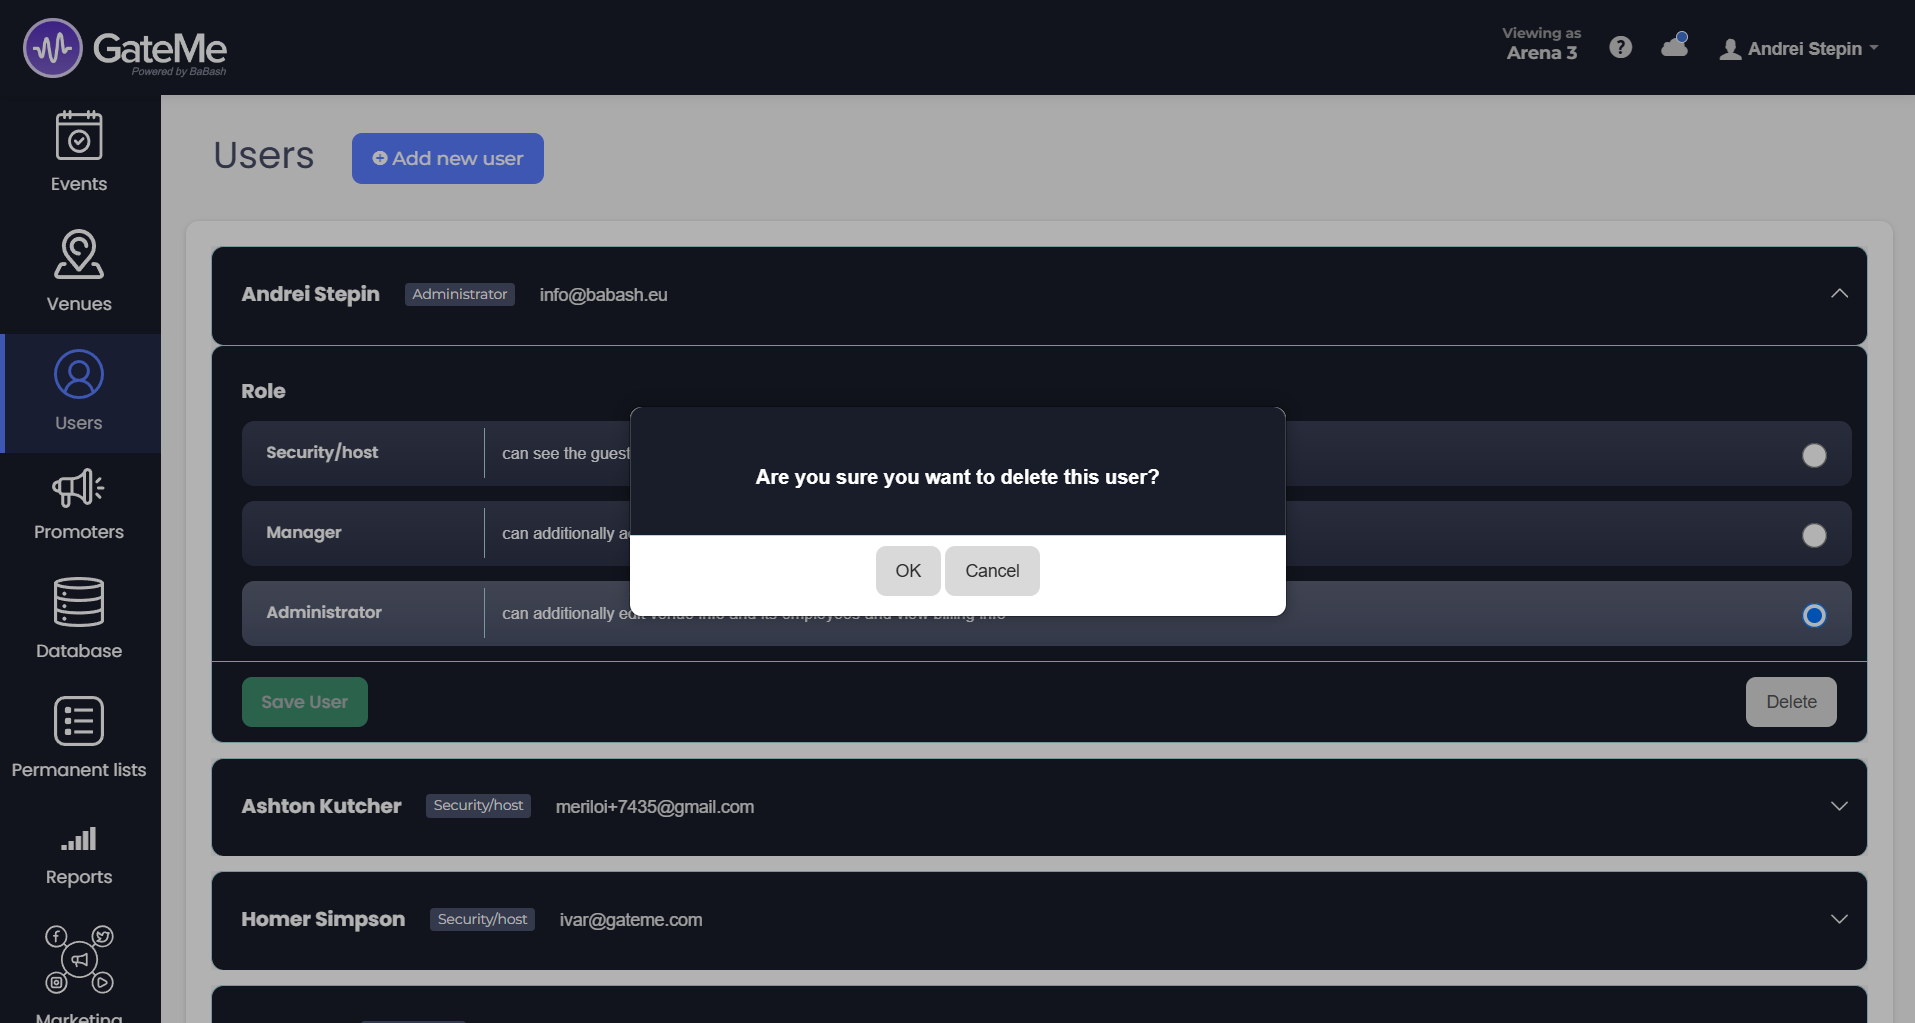
Expand the user entry by clicking the dropdown arrow.
-
Click the Delete button at the bottom right of the expanded panel.
-
Confirm the deletion if prompted.
Once deleted, the user will no longer have access to the venue in GateMe PRO.
For Event Organizers
Event Creation
Marketing Tools
Reports
Payouts
Marketing&Tracking
Promote Event
Promoters
Seated Tickets
Promo Codes
Permanent Lists
Additional Questions
Check-In Guests
Staff&Users
Free Tickets
Refunds
Database
Guest Lists
For Ticket Buyers
Recover Your Tickets


